Thursday, 31 October 2024

How to undo last commit in Git


If you need to undo the last merge in Git, you can take a couple of approaches depending on your situation. Below are the common methods:

1. Undo the Last Merge Commit

If you want to undo the last merge commit and return to the state before the merge:

      git reset --hard HEAD~1

  • This command will reset your current branch to the commit before the last one, removing the merge commit. Be careful: This will discard any changes made in the merge.

2. Undo a Merge But Keep Changes

If you want to undo the merge but keep the changes in your working directory, use:

      git reset --soft HEAD~1

  • This command moves the HEAD pointer back one commit but keeps all changes in the staging area. You can then review or modify them before committing again.

3. Revert a Merge Commit

If the merge has already been pushed to a remote repository and you want to keep the history but effectively "undo" the merge, you can use:

      git revert -m 1 <merge_commit_hash>

  • Replace <merge_commit_hash> with the hash of the merge commit you want to revert. The -m 1 option indicates that you want to keep the first parent of the merge.

Example Workflow

  1. Find the Merge Commit Hash: You can see the history with:

      git log --oneline

Look for the commit that represents the merge.

  1. Revert the Merge Commit: Use the revert command:

      git revert -m 1 <merge_commit_hash>

Important Notes

  • Always make sure to check your current branch and commit history before performing destructive actions like reset --hard.
  • If you're working in a shared repository, communicate with your team when undoing merges to avoid confusion.
  • If you've already pushed the merge commit to a remote repository, consider using git revert instead of reset to maintain a clear history.
 

Thursday, 17 October 2024

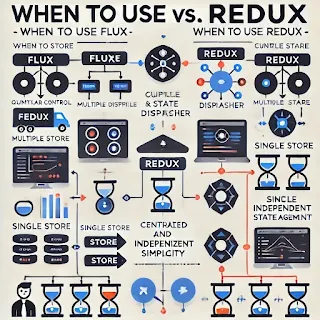
When to Use Flux vs. Redux


Flux and Redux are both state management architectures for JavaScript applications, especially React, but they have important differences in terms of complexity, approach, and use cases.

When to Use Flux:

  1. Multiple Stores: If your application has a complex state architecture that requires multiple independent stores, Flux may be a better fit. It allows each store to handle its own portion of the state separately.

  2. Granular Control: If you need fine-grained control over the flow of data and the state management for different parts of the app, Flux's architecture with multiple stores might be useful.

  3. Existing Flux Ecosystem: If you're working with an existing project that already uses Flux or a framework that has tight integration with Flux, it may make sense to continue using it rather than switch.

When to Use Redux:

  1. Global State Management: When your app requires a centralized and predictable state management system, Redux is ideal due to its single global store.

  2. Scalability and Predictability: For large-scale applications where state predictability, immutability, and debugging are critical, Redux is a better choice. The single source of truth makes state changes more predictable.

  3. Simplified Development: Redux, especially with the Redux Toolkit, simplifies state management and minimizes boilerplate code, making it more efficient for modern app development.

  4. Middleware and Asynchronous Logic: If your app requires complex side effects (like API calls), Redux's middleware ecosystem (like redux-thunk, redux-saga) is highly efficient for handling asynchronous actions.

  5. Easier Debugging: With Redux DevTools, tracking state changes, time-travel debugging, and inspecting the app’s state becomes much simpler.

Summary:

  • Flux is useful for apps requiring multiple stores or granular control over different areas of the state, but it comes with more complexity.

  • Redux is a simpler, scalable solution for apps needing a centralized state, predictability, and robust middleware support. It’s ideal for most React-based applications, especially large-scale ones.


Wednesday, 16 October 2024

Difference Between Flux and Redux


Flux and Redux are both state management architectures for JavaScript applications, especially React, but they have important differences in terms of complexity, approach, and use cases. Let's dive into a comparison.


Feature

Flux

Redux

Architecture

Unidirectional data flow with multiple stores and a dispatcher.

Unidirectional data flow with a single global store.

Stores

Multiple stores, each managing a part of the app's state.

Single store managing the entire app's state tree.

Dispatcher

Central dispatcher to handle action distribution to stores.

No dispatcher; actions are sent directly to reducers.

State Management

Each store has its own state, which can lead to complexity.

Single source of truth for the entire app state.

Reducers

Stores update state directly based on actions received.

Pure functions (reducers) define how the state updates.

Middleware

No native support for middleware.

Supports middleware for handling side effects (e.g., redux-thunk, redux-saga).

Action Handling

The dispatcher sends actions to stores.

Actions dispatched directly to the reducer.

Immutability

Not enforced by default, stores can modify the state directly.

Emphasizes immutability with reducers returning new state.

Ease of Debugging

Harder to trace changes due to multiple stores.

Easier to debug with a single state tree and tools like Redux DevTools.

Learning Curve

Steeper due to multiple stores and dispatcher interaction.

Easier, especially with Redux Toolkit simplifying setup.


Summary

  • Flux allows for more flexibility with multiple stores but can become complex as your app scales.

  • Redux simplifies the architecture by centralizing the state into a single store, with reducers managing state changes and excellent tooling for debugging.

Tuesday, 15 October 2024

An Overview Of FLUX Architecture


Flux Architecture is a pattern for managing unidirectional data flow in React applications. It was introduced by Facebook to handle complex state management efficiently. Flux emphasizes a clear separation of concerns and predictable state changes, making it easier to manage the application state as the app grows in complexity.

Key Concepts of Flux Architecture

  1. Action:

    • Actions are payloads of information that send data from your application to the store. They are triggered by user interactions or other events (like an API call).

    • Actions are simple JavaScript objects with two properties: type (describing the action) and payload (containing relevant data).

Example:

{

  type: 'ADD_ITEM',

  payload: { id: 1, name: 'Item 1' }

}

  1. Dispatcher:

    • The dispatcher is a central hub that manages all actions and coordinates updates to the stores.

    • It acts as a mechanism to dispatch the action to the appropriate store(s) by registering callbacks.

In essence, when an action is created, it goes through the dispatcher to the stores.

  1. Store:

    • Stores hold the state of the application. Each store is responsible for a particular domain of the app (e.g., a UserStore, ProductStore).

    • When a store receives an action, it updates its state accordingly and then notifies the views (React components) of the change.

    • Stores have no direct communication with each other; they only respond to the dispatcher.

  2. View (React Component):

    • Views are React components that listen to changes in the store and re-render when the state changes.

    • They fetch the current state from the store, which drives the UI.

    • User interactions in the view trigger actions, creating a loop.

Flux Unidirectional Data Flow

The key principle in Flux is unidirectional data flow, which ensures data moves in a single direction, simplifying state management:

  1. Action: User interaction or a system event triggers an action.

  2. Dispatcher: The dispatcher forwards the action to the store.

  3. Store: The store processes the action, updates its state, and emits a change event.

  4. View: The view re-renders in response to the state change and the cycle continues.

Flux Data Flow Overview

  1. A user interacts with the View: This can be a button click or form submission.

  2. An Action is created: The View creates an Action and sends it to the Dispatcher.

  3. Dispatcher sends the Action to the Store: The Dispatcher passes the Action to all registered Stores.

  4. Store updates and emits a change: The Store processes the action, updates its internal state, and emits a change event.

View re-renders based on updated state: The View listens to the Store's change event and fetches the updated state to reflect it in the UI.

Sunday, 13 October 2024

Understanding JWT ( JSON Web Tokens)


JWT (JSON Web Token) is a secure, compact, and self-contained way to transmit information between parties as a JSON object. JWT tokens are often used for authentication and authorization in web applications.

How JWT Works

  1. User Login: A user provides their credentials (like username and password) to log in.

  2. Token Generation: Upon successful login, the server generates a JWT and sends it back to the client.

  3. Token Storage: The client stores the token (often in localStorage or sessionStorage).

  4. Authentication: For future requests, the client includes the JWT in the request headers (typically using the Authorization: Bearer <token> header).

  5. Token Validation: The server validates the token using a secret key and, if valid, grants access to protected resources.

JWT Structure

A JWT consists of three parts, separated by dots (.):

  1. Header: Specifies the type of token (JWT) and the signing algorithm (e.g., HMAC, SHA256).

  2. Payload: This contains the claims, which are statements about an entity (usually the user) and additional data (e.g., user roles, and permissions).

  3. Signature: Ensures the token hasn't been tampered with. It's created by encoding the header and payload, and then signing it using a secret key.

Example JWT:

eyJhbGciOiJIUzI1NiIsInR5cCI6IkpXVCJ9.eyJzdWIiOiIxMjM0NTY3ODkwIiwibmFtZSI6IkpvbiBEb2UiLCJpYXQiOjE1MTYyMzkwMjJ9.SflKxwRJSMeKKF2QT4fwpMeJf36POk6yJV_adQssw5c

  • Header: eyJhbGciOiJIUzI1NiIsInR5cCI6IkpXVCJ9

  • Payload: eyJzdWIiOiIxMjM0NTY3ODkwIiwibmFtZSI6IkpvbiBEb2UiLCJpYXQiOjE1MTYyMzkwMjJ9

  • Signature: SflKxwRJSMeKKF2QT4fwpMeJf36POk6yJV_adQssw5c

Why Use JWT?

  • Stateless Authentication: Since JWT is self-contained, no server-side session storage is needed.

  • Compact: JWT tokens are small in size and can be easily transmitted in HTTP headers, cookies, or URLs.

  • Secure: The signature ensures data integrity and sensitive information can be encrypted.

Common Use Cases

  • Authentication: JWTs are often used to prove a user's identity after they log in.

  • Authorization: JWTs can include claims that specify the roles or permissions a user has, enabling role-based access control (RBAC).

  • Data Exchange: JWTs can securely transmit information between parties due to their signed nature.

Best Practices

  1. Keep Tokens Short-Lived: Use short expiration times and refresh tokens to minimize the risk of misuse.

  2. Store Tokens Securely: Avoid storing JWTs in localStorage as it is vulnerable to XSS attacks. Instead, use HttpOnly cookies.

  3. Use HTTPS: Always transmit JWTs over HTTPS to prevent man-in-the-middle attacks.

  4. Sign JWTs Securely: Use strong algorithms (like HMAC SHA256 or RSA) and keep your signing secret/key safe.

Conclusion

By using JWT in backend and React frontend, you can manage authentication and secure your routes. JWT provides a stateless way to ensure that users are authenticated, making it scalable and efficient for modern applications.

Saturday, 12 October 2024

Warm Dussehra Wishes from the DevUnbound Community!


As we celebrate the festival of Dussehra, the DevUnbound Community sends you heartfelt wishes for prosperity, happiness, and the triumph of good over evil. Just as Lord Rama triumphed over Ravana, may this festival inspire you to conquer all the challenges in your life and illuminate the path to success.

May the spirit of Dussehra fill your heart with courage, compassion, and positivity. Let this festival be a reminder that no matter how tough the battles may be, righteousness and truth always prevail.

Wishing you and your loved ones a joyous and prosperous Dussehra filled with light, love, and victory!

The DevUnbound Community

Friday, 11 October 2024

Simplifying Your State Management with Redux Toolkit blog image


Managing state in complex applications has always been a challenge, but with the Redux Toolkit, developers can enjoy a much easier and more efficient way to handle state. Redux Toolkit provides a set of tools that simplify Redux development by reducing boilerplate and making common tasks like state mutation and action dispatching more straightforward.

What is Redux Toolkit?

Redux Toolkit is the official, recommended way to write Redux logic. It was created to address the complexity of setting up Redux from scratch, allowing developers to focus on building features rather than worrying about boilerplate code.

With features like createSlice, configureStore, and createAsyncThunk, Redux Toolkit streamlines development, making Redux more approachable, even for beginners.

Why Use Redux Toolkit?

  • Less Boilerplate: Redux Toolkit simplifies the syntax, reducing the need to write repetitive code.

  • Better Developer Experience: Built-in tools like Redux DevTools make state management and debugging easier.

  • Simplified Async Logic: Redux Toolkit introduces createAsyncThunk to handle side effects, such as API calls, in a clean and consistent manner.

  • Opinionated Defaults: Common practices like immutable updates and side-effect handling are built-in, ensuring better performance and maintainability.

Key Features of Redux Toolkit

  1. createSlice: Combines reducers, actions, and action creators into a single slice object. This reduces the need for writing separate files for each.

const counterSlice = createSlice({

  name: 'counter',

  initialState: 0,

  reducers: {

    increment: (state) => state + 1,

    decrement: (state) => state - 1,

  },

});


export const { increment, decrement } = counterSlice.actions;

  1. configureStore: A wrapper around Redux’s createStore, allowing you to automatically set up best practices like combining reducers and adding middleware.

const store = configureStore({

  reducer: {

    counter: counterSlice.reducer,

  },

});

  1. createAsyncThunk: This is used for handling asynchronous logic, like API requests, without having to write custom middleware.

export const fetchUser = createAsyncThunk(

  'users/fetchUser',

  async (userId) => {

    const response = await fetch(`/api/users/${userId}`);

    return response.data;

  }

      );

How to Set Up Redux Toolkit in a React Project

  1. Install Redux Toolkit: Install @reduxjs/toolkit and react-redux to start using Redux Toolkit in your React app.

npm install @reduxjs/toolkit react-redux

  1. Set Up Your Store: Use configureStore to create your store and include your reducers.

import { configureStore } from '@reduxjs/toolkit';

import counterReducer from './counterSlice';


const store = configureStore({

  reducer: {

    counter: counterReducer,

  },

});

  1. Use Redux in React Components: Use the useSelector hook to access the state and useDispatch to dispatch actions from your React components.

import { useSelector, useDispatch } from 'react-redux';

import { increment, decrement } from './counterSlice';


function Counter() {

  const count = useSelector((state) => state.counter);

  const dispatch = useDispatch();


  return (

    <div>

      <h1>{count}</h1>

      <button onClick={() => dispatch(increment())}>Increment</button>

      <button onClick={() => dispatch(decrement())}>Decrement</button>

    </div>

  );

      }

Handling Asynchronous Logic with Redux Toolkit

One of the standout features of Redux Toolkit is createAsyncThunk, which simplifies handling async operations like data fetching. This can easily be incorporated into any React component.

Best Practices for Redux Toolkit

  • Use createSlice to simplify action and reducer logic.

  • Avoid Mutating State Directly: Redux Toolkit ensures immutability under the hood using Immer.

  • Handle Side Effects with createAsyncThunk: It provides a clean way to handle async logic, making Redux middleware less complex.

Conclusion

Redux Toolkit has revolutionized the way developers manage state in their applications. By reducing the boilerplate code associated with Redux, introducing opinionated best practices, and offering powerful tools for handling asynchronous logic, Redux Toolkit is the modern solution to building scalable and maintainable state management systems.